Practical School Wildlife Ponds – building your wildlife pond.
Landscape design tips for your new pond.
Before you start digging, have a landscape design plan for the wildlife pond. Think about ecology. If you need help, ask for it; from local experts, or from parents or governors. If you have already completed a pond or have an old pond to restore; to improve the pond ecology, or for more information and planting tips go to; landvision blog. We always like your feedback so leave a comment.
Planting school wildlife ponds
This is the one in a series about creating a school wildlife pond. Others are:
So you’re going to dig a new hole for a pond?
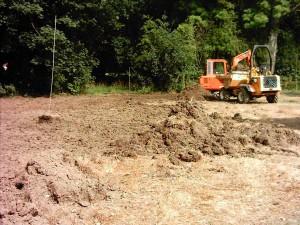
- Where is the spoil going to go?
- Wildlife pond: digging a pond
- How is it going to get there?
- How much spoil will there be?
- What shape are you going to dig out?
Are you interested in using the pond for educational purposes? See the blog for more details on why and how Creating a pond and an adjacent wildlife area will have a beneficial effect on species and habitat. We have a blog on planting that is here
For school wildlife ponds think about access and pond dipping. This means that access must be safe and preferably an all weather path with a small decked or paved area for dipping will at least be required. For safety on school grounds, a lockable gate and a fence will also need to be installed.
School Wildlife Pond – services and protection of features.
- Do you need to protect existing features? These might be existing plants or an area of important or rare, native wetland plants or reeds; these should be kept for wildlife habitat.
- Are there likely to be underground services?
- These services must be clearly marked on the ground before excavation starts and be several metres beyond the pond excavation area.ervices? (Gas, water pipes or electricity.)
- If you are taking the spoil off site, is there space nearby for the temporary storage of spoil?
- Can a lorry get to the pond site or do you have to move the spoil to load it into the lorry?
- Can you re use the topsoil? If so, do try to keep it. Topsoil is expensive to buy and to transport. It will probably be required for landscaping the margins of pond areas or on other adjacent planting areas later anyway.
Volonteers in wildlife pond creation.
A small pond can be dug by hand, but remember that the best time to dig a pond is in summer, when the ground is dry, but that also means that ground can be very hard. It is worth asking for help as the pond project will at least get completed sooner. If you are using volunteers, don’t expect them to turn up the next day if you ware them out. They may not be able to undertake a whole day digging and may require regular tea breaks due to heat. The vagaries of the UK weather may also mean that progress may be interrupted by rain or there could be a heatwave.
They need to come prepared for the expected weather.
Next phases to School Wildlife pond creation.
So you now have a design and a plan of action.
If you are using a mini digger ask for first drop off in the morning. Otherwise the digger may not be delivered until half way through the morning- with a lot of wasted time, standing around waiting for it. If there is a team of people this can be dispiriting and irritating.
If you have to hire a digger, make sure it comes with a experienced driver they are worth their weight in gold.
Do not be afraid to ask for a discount if you are undertaking a school or community wildlife pond project. Firms will often be keen to help community projects such as this to help wildlife and schools.
Starting your new wildlife pond.
- Mark the site out, measure off from the design.
- Strip off all the topsoil first from the area; preferably have the area sprayed off if it is grass, a week or two beforehand. Usually topsoil can be used elsewhere, if so, you can store it away; keeping it separate from the subsoil.
- Next, dig out the subsoil. If money is limited and there is space, you can use the subsoil on site.
- You can do so as long there is no soil contamination (previous soils contaminated by garage use or dumping of waste materials or sites with Japanese knot weed will all require special care and removal of spoil to a special licensed tip off site.)
Top tips, Remember that the pond should have:
- Gently sloping side on one side.
- Perhaps shelving around th eother sides.
- Be of an irregular shape.
- For a wildlife pond, the depth should be between 0.5m to 1m, with a shallow area.
- If using a deck for pond dipping activities, think about where the uprights to support this decking are going to be.
- Size – a small pond could be 1.8m x 1.5m x 0.6m deep
- Once the hole is dug, the next job is removing stone and lining the pond. Perhaps, some hand shaping may be required as well.
There is a good video here on creating a wildlife pond or the Forestry Commission has a pdf here
A soft builder’s sand should be used for lining the pond. On the video link above, pondguru uses sand and polyfelt. Some landscapers use either one or the other. Using both is really good practice and hopefully the pond will be around for many more years that way, without a puncture to the liner. So, we strongly recommend that you use both.
For more advice on your pond or landscape design or to discuss your site, go to Contact us; or you can leave a message on the blog at landvision.co.uk. blog